Note 1 for Manim Project
Basic Python
The following things (beside classes and inheritance) should be the things you already know.
Variables
You can learn them in W3Schools.
1 | a = 1 # Comments are written after a hash sign |
Condition and Loop
if-elif-else statement. You can also learn them in W3Schools.
1 | if a == 1: |
while loop. You can also learn them in W3Schools.
1 | while a < 10: |
for loop. You can also learn them in W3Schools.
1 | arr = [1, 3, 6, 4, 2, 1] |
Functions
Define and invoke a function. You can also learn them in W3Schools.
1 | def f(x): |
Lambda expression. You can also learn them in W3Schools.
1 | g = lambda x: x + 1 |
Numpy and math functions. For more information of numpy, see here.
1 | import numpy as np |
Classes and Objects
Manim
You can see the official documentation to learn more about manim.
Make sure that you have already installed manim on your computer. You don’t need LaTeX for the following examples, however, you will need to install LaTeX in the future if you want to add math equations to your animation.
Here is an example code:
1 | from manim import * |
Create a new file called manim_test.py under any folder you like, and run this command in the commandline:
1 | manim manim_test.py Test -ql |
After the program finishes execution, you should see a new folder called media under your project folder. The folder structure now should look like this:
1 | your project |
The “Test.mp4” file under “480p15” folder is the video generated by manim from the code you just write. You can open it and see the animation you just created.
For those who are not familiar with command lines:
manim manim_test.py Test -qlis a typical command line command. A command is usually one line containing several words separated by spaces. The words are called “arguments”.The first word,
manimin this case, indicates the executable program this command is running. In this case, python already installed manim on your computer, so you can run it directly by typing the command.Other words,
manim_test.pyandTestin this case, are arguments of the command. Depending on the specific format of the command, the format of arguments may differ. In the case ofmanim, the two arguments are the file name and class name of your code. Usingmanim_test.pyandTesttells the program to find a class calledTestin themanim_test.pyfile.Finally, the last argument,
-ql, starts with a dash (-symbol). These type of arguments are called “flags”. Flags usually indicates additional information provided to the executable file. In this case,-qltells manim to generate the video in low quality.Different executables have different rules for parsing the arguments. In most cases, if you want to check the details of one specific command, you can type the command with a
--helpargument and a help message where you can learn about the command will be displayed.
Geometric shapes
Here are some basic geometric shapes. The following code is written inside the construct function in whatever class you named it that inherits from manim’s Scene:
1 | c = Circle(color = YELLOW) # Create a yellow circle |
This code will generate the following image:
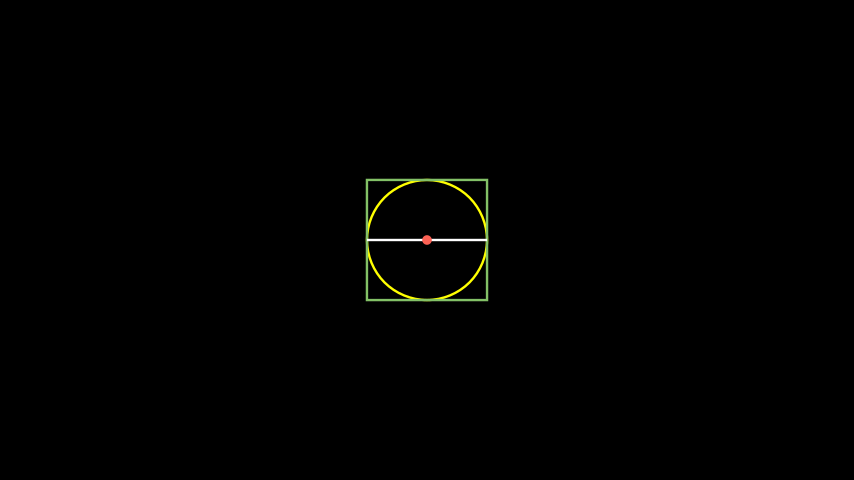
Note that until you run the self.add(something) command, the shape is not on the screen although it is created and held by a variable. “Whether the shape is created” and “whether manim knows it is on the screen” is different. You can test this out by removing one or multiple self.add(something) lines to see the effect.
Every shape has their own constructor. You can also check out the manim reference for the details of these objects.
For example, you can construct a circle with given radius, color, and position:
1 | circle = Circle() # This is the default circle |

Circle, Square, Line, Dot, and many other shapes listed in the manim reference are inherited from a single class called Mobject. Mobject stands for “mathmatic objects”, which has some basic properties such as position, color, etc. that every object has in common.
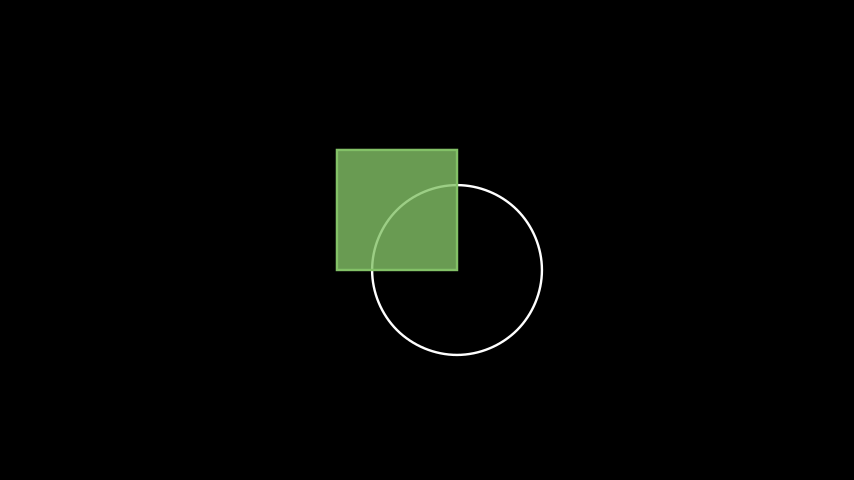
Exercise
Can you create this image with manim? There are 3 requirements:
- The circle is white and hollow
- The square is green and filled with 0.8 opacity
- The circle passes through the square’s center, and the square’s corner lies on the circle’s center
Animations
Animations represents anything that “changes with time” on the screen. Animations are represented by objects inherited from manim’s Animation class.
Note that add and remove are not animations, since they won’t actually take up any time in the generated video - they are performed simultaneously.
self.play(animation) plays an animation in manim.
There are several animations that may be useful to you:
1 | ## Create(mobject): Performs the creation of an object |
Here is the video produced by the previous code:
For more information, you can check out the manim reference.
Now you are able to do a lot of animations. Try to experiment with manim and create the best animation!